Follow Me On Social Media!

Homemade Chocolate Bars 4 Ways: Indulgent Treats with Labels
Introduction to Homemade Chocolate Bars 4 Ways
Homemade chocolate bars can transform an ordinary day into a delightful experience, evoking memories of childhood treats and simple pleasures. Picture yourself in the kitchen, melting rich chocolate as sweet aromas fill the air. Creating your own chocolate bars allows you to customize flavors and ingredients, making your treats not only delicious but uniquely yours. The satisfaction of crafting a bar that’s just as you like it—be it nutty, fruity, or decadent—brings a sense of accomplishment that store-bought sweets simply can’t match.
So, what makes homemade chocolate bars so delightful? The answer lies in the personal touch and control you have over every aspect of your creation. Whether you’re aiming for a health-conscious snack or a luxurious indulgence, making chocolate at home can cater to all your needs. You can choose organic, fair-trade chocolate, adjust sweetness levels, and even experiment with various toppings like sea salt, nuts, or dried fruits. The flexibility is endless!
Imagine inviting friends over for a cozy afternoon, and instead of reaching for a candy bar from the pantry, you present them with a beautifully crafted homemade chocolate bar. Instantly, the atmosphere shifts—impressed smiles and compliments flow as they enjoy your thoughtful creation. This is more than just chocolate; it’s a unique gift of love and creativity.
In this article, we’ll explore four delightful recipes for homemade chocolate bars, each with a distinct twist. From classic chocolate infused with fresh ingredients to bars with surprising flavors, there’s something to please every palate. Plus, we’ll provide printable labels to help you mark your creations, making them perfect for gifting or simply organizing your own sweet stash. So roll up your sleeves, grab your favorite ingredients, and let the chocolate-making adventure begin!
Key Ingredients for Homemade Chocolate Bars
Creating homemade chocolate bars allows you to bring out your inner chocolatier, turning simple ingredients into delightful treats that can be customized to your taste. Here’s what you’ll need:
-
Cocoa Butter: This is the magic ingredient! Its rich fat content gives our chocolate that luscious texture and glossy finish. Look for a high-quality, food-grade cocoa butter to achieve the best results.
-
Cocoa Powder: Unsweetened cocoa powder adds intensity and depth. It’s the foundation of chocolate flavor. Choose a natural cocoa powder for a more robust profile or Dutch-processed for a smoother taste.
-
Sweetener: Depending on your preference, you can opt for sugar, honey, or even maple syrup. Sweeteners balance the richness of the cocoa and cocoa butter, ensuring your chocolate is indulgent but not overwhelming.
-
Milk Powder: This is essential if you’re making milk chocolate. It contributes to creaminess and enhances sweetness. You can use whole milk powder or a dairy-free alternative, depending on your dietary needs.
-
Flavorings and Add-Ins: Customize your chocolate with vanilla extract, sea salt, or even nuts and dried fruits. The possibilities are endless, making each batch uniquely yours!
Why You’ll Love This Recipe
Indulging in Homemade Chocolate Bars 4 Ways opens a world of sweet possibilities right in your kitchen. Picture this: you’ve had a long day, and the only thing that can brighten it up is your favorite chocolate. With this simple recipe, you get to create not just one, but four different flavors, tailored to your cravings!
Customizable to Your Taste
What’s magical about making your own chocolate bars is that you have complete control over all the ingredients. Prefer dark chocolate? Go for it! Want to mix in nuts, fruits, or even some sea salt? The choice is entirely yours. Each variation can become a new favorite, making every batch a delightful adventure.
Freshness You Can Taste
Making chocolate at home means you get to enjoy the freshest flavors. Imagine the rich aroma wafting through your kitchen as you melt the chocolate; it’s an experience that pre-packaged chocolate just can’t match. Plus, the satisfaction of biting into a bar you created is a feeling like no other.
Perfect for Gifting
These homemade chocolate bars aren’t just tasty; they also make for beautiful gifts. Pair them with the printable labels included in the recipe, and you have a thoughtful present that friends and family will love.
Get ready to elevate your chocolate game with this delightful recipe!
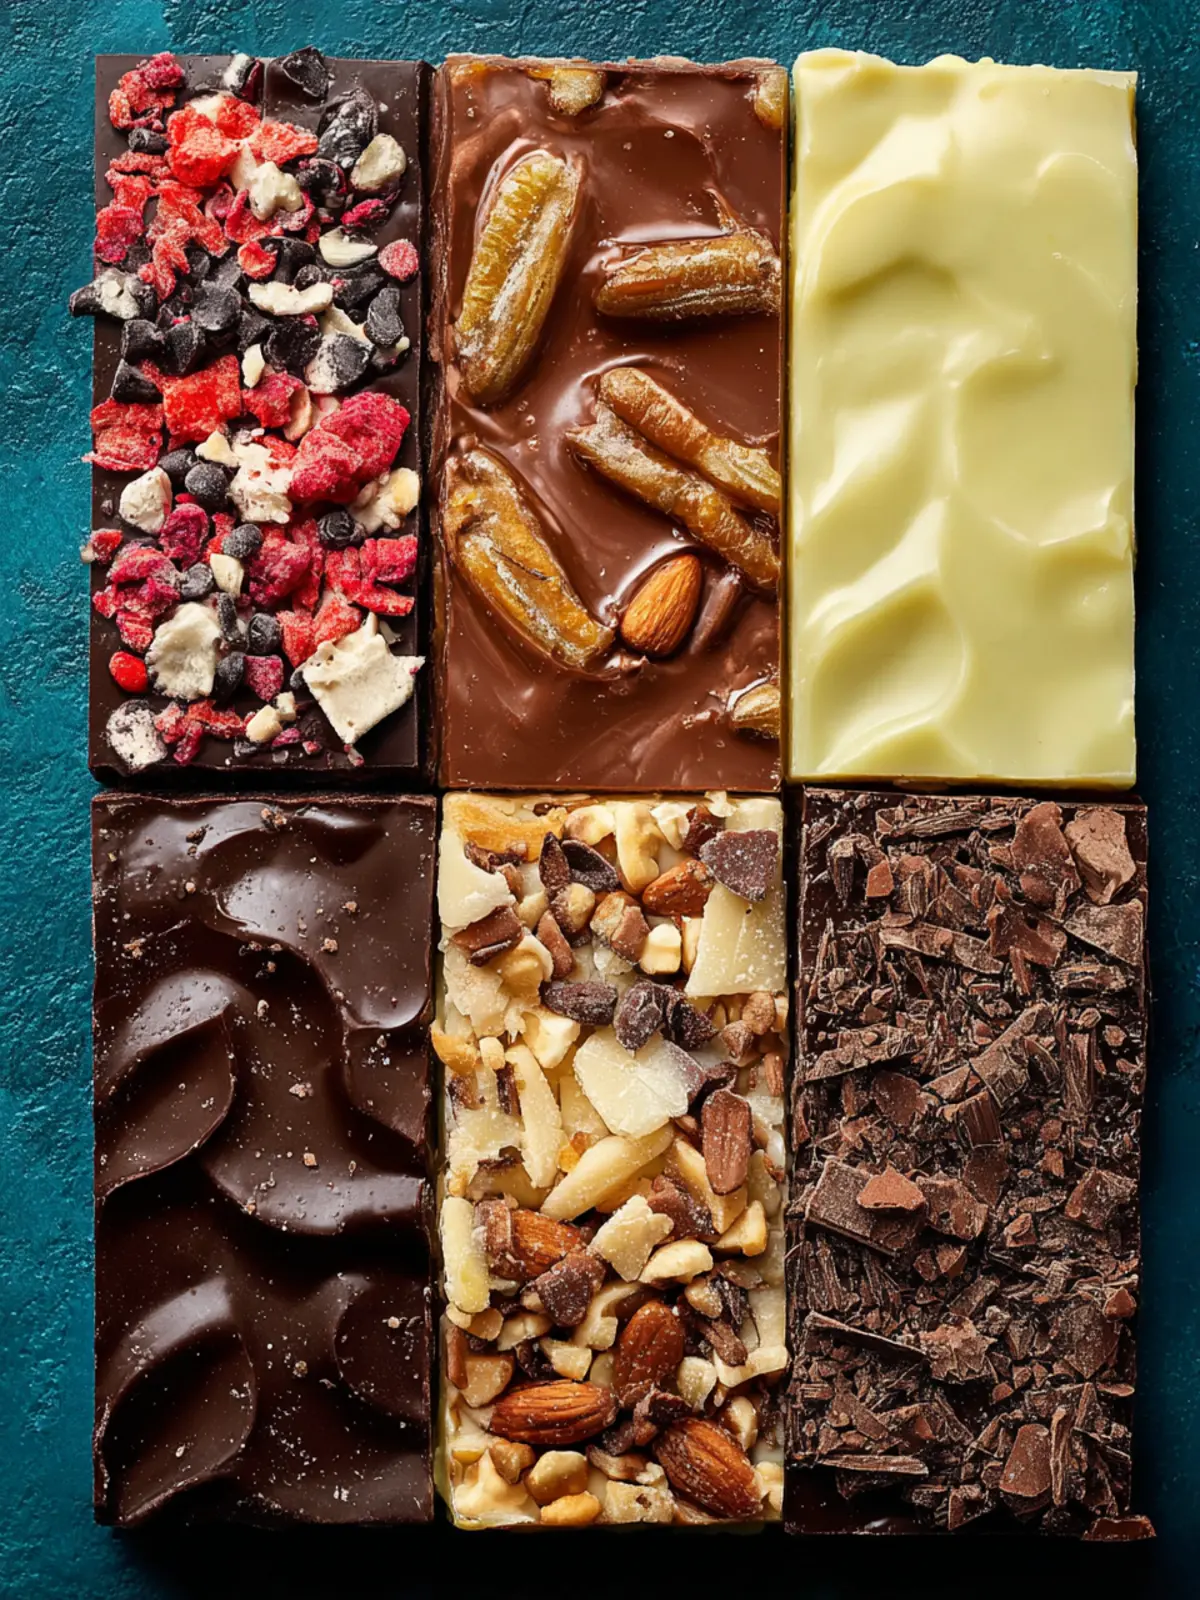
Variations of Homemade Chocolate Bars
Dive into the delightful world of homemade chocolate bars, where creativity knows no bounds. Each variation tells a unique story, making these treats not just a snack, but a personal experience in every bite. Let’s explore some tempting ideas to transform your basic chocolate creation into something spectacular.
Nutty Crunch Bars
If you’re in the mood for a little texture, try adding mixed nuts to your homemade chocolate bars. Almonds, walnuts, or hazelnuts deliver a satisfying crunch, while also amplifying the health benefits. Just chop them up and mix them into the chocolate before pouring it into your mold.
Fruit & Chocolate Fusion
Who can resist the combination of fruity sweetness and rich chocolate? Dried fruits like cranberries, apricots, or cherries can elevate your bars with their chewy texture and tangy flavor. Simply fold in your favorite dried fruits into the melted chocolate, and you’ve got a treat that’s both sweet and nutritious.
Spicy Chocolate Experience
Feeling adventurous? Add a pinch of sea salt and a sprinkle of cayenne pepper to your chocolate mixture. This unexpected heat pairs beautifully with the sweet, creamy chocolate and creates a tantalizing flavor explosion. It’s a perfect conversation starter at gatherings!
Gourmet Dark Chocolate Delight
For an indulgent twist, opt for high-quality dark chocolate with a cocoa content of 70% or higher. The deeper the cocoa flavor, the more satisfying your chocolate bars. You might even consider infusing them with espresso or a dash of vanilla extract for an enhanced taste sensation.
Crafting your homemade chocolate bars 4 ways allows you to cater to your cravings, explore new flavors, and impress family and friends. Embrace the joy of chocolate-making and let your imagination run wild!
Cooking Tips and Notes
Creating your own Homemade Chocolate Bars 4 Ways is not just about the ingredients; it’s about mastering the art of chocolate-making with a sprinkle of creativity. Here are some tips to elevate your chocolate bar game:
Selecting Your Chocolate
- Quality Matters: Opt for high-quality chocolate—look for bars with a cocoa percentage of at least 60% for rich flavor. Brands like Merckens or Callebaut are favorites among chocolatiers.
- Chop It Up: For even melting, chop your chocolate into uniform pieces. This helps everything melt smoothly and ensures a luxurious texture.
Flavor Additions
- Experiment Freely: Don’t hesitate to mix in flavors! Sea salt, nuts, or dried fruits can take your bars to the next level. Remember that some flavors can be potent, so start with a small amount.
- Infused Combinations: You can infuse your chocolate with herbs or spices like mint or cinnamon. Just steep them in the melted chocolate for a few minutes before straining.
Storage Tips
- Cool and Store Properly: After pouring your chocolate, let it cool at room temperature, then store it in the fridge. Wrap them in parchment or place them in airtight containers.
- Label with Love: If you’re gifting these delicious creations, consider using the printable labels provided in this recipe. They’ll make your chocolate treats even more special!
Embrace the fun of experimenting with these tips, and your Homemade Chocolate Bars 4 Ways will surely impress family and friends!
Serving Suggestions for Homemade Chocolate Bars
Creating homemade chocolate bars can be a delightful experience, and once you’ve mastered the craft, it’s all about how to enjoy them! These rich, chocolatey treats can be served in various ways, making them perfect for any occasion.
-
Gifting: Package your chocolate bars in decorative boxes or wrap them in colorful paper. Attach a handwritten note for a personal touch—ideal for celebrations or as a sweet surprise for friends.
-
Pairing with Beverages: Enjoy your chocolate bars with a refreshing glass of milk, a steaming cup of coffee, or even a rich red wine. The flavors of the chocolate can be elevated with the right drink, making for a luxurious treat.
-
As an Ingredient: If you want to get a little creative, chop your chocolate bars into chunks and add them to cookies, brownies, or even ice cream.
-
Charcuterie Boards: Include your homemade chocolate bars on a dessert charcuterie board alongside assorted cheeses, fruits, and nuts. This way, you’ll have a blend of sweet and savory flavors to please every palate.
By experimenting with these serving ideas, you’ll find that your homemade chocolate bars 4 ways are perfect for sharing, gifting, or indulging in a well-deserved treat.
Time Breakdown for Homemade Chocolate Bars
Creating your Homemade Chocolate Bars involves a delightful balance of preparation and patience. Here’s a simple breakdown to help you get the timing just right.
Preparation Time
Your adventure begins with about 15 minutes of prep time. This is when you’ll gather your ingredients, melt the chocolate, and mix in any exciting additions such as nuts or dried fruit.
Cooling Time
Once you pour your melted chocolate into molds, it’s time for a cooling period of at least 30 minutes. This allows your chocolate to set properly, achieving that perfect snap when you take a bite.
Total Time
In total, expect to spend around 45 minutes from start to finish. With such a small time investment, you’ll be rewarded with delicious Homemade Chocolate Bars 4 Ways that are sure to impress family and friends!
Nutritional Facts for Homemade Chocolate Bars
When you embark on the delicious journey of making Homemade Chocolate Bars 4 Ways, you’ll discover that you not only create a comforting treat but also have control over its nutritional value. Let’s break down the essential facts to keep your snack guilt-free and enjoyable.
Calories
Depending on the ingredients you choose, one serving of your homemade chocolate bar can range from 150 to 200 calories. Crafting with organic cocoa and natural sweeteners can help lower the overall caloric content without sacrificing taste.
Sugar Content
One of the biggest advantages of DIY bars is adjusting the sugar content. Typically, commercial chocolate can be loaded with refined sugars. In your homemade versions, you’ll often find around 8 to 12 grams per serving, especially when using alternatives like honey or maple syrup.
Fats
The beauty of making your own chocolate bars lies in choosing the types of fats. Most recipes will yield about 10 to 15 grams of fat per serving, mainly from ingredients like cocoa butter or coconut oil. Opt for high-quality, healthier fats to create a rich, satisfying flavor profile without compromising health.
By being mindful of these nutritional facts, your homemade chocolate bars can be both an indulgent and health-conscious treat!
FAQs about Homemade Chocolate Bars
Homemade chocolate bars open up a world of delicious possibilities, allowing you to craft your favorite flavors right in your kitchen. Whether you’re feeling adventurous or craving something classic, knowing a few key facts can make your chocolate-making experience even more enjoyable.
Can I customize the flavors of my chocolate bars?
Absolutely! One of the joys of making homemade chocolate bars is the freedom to experiment. You can infuse your chocolate with flavors like sea salt, chili powder, or even espresso to create unique tastes. Try adding various mix-ins—think nuts, dried fruits, or spices—to personalize each batch. Just remember that balancing flavors is essential, so start with small amounts and adjust to your liking.
How do I store homemade chocolate bars?
To keep your homemade chocolate bars fresh, store them in an airtight container at room temperature, away from direct sunlight. If you live in a warm climate, consider refrigerating them, but let them come to room temperature before enjoying to enhance their flavor and texture. Ideally, they’ll last for up to two weeks—if they last that long!
What’s the best way to temper chocolate?
Tempering chocolate is crucial for achieving that coveted shine and satisfying snap. The simplest method involves melting two-thirds of your chocolate until it reaches 110°F (43°C), then adding the remaining third to cool it down to around 90°F (32°C). This process helps stabilize the cocoa butter crystals, ensuring your homemade chocolate bars have the best texture. With practice, you’ll master this technique, and you’ll notice the difference in quality!
With these tips, your homemade chocolate bars 4 ways will be a hit, delectable enough to share (or keep all to yourself!).
Conclusion on Homemade Chocolate Bars
Creating homemade chocolate bars is not just a delightful activity; it’s a personal journey into the world of flavors and creativity. Whether you opt for the classic chocolate, nutty variations, or fruity infusions, you’ve transformed everyday ingredients into something truly special. Think about how satisfying it is to share these homemade treats with friends or family, making memories one bite at a time. Armed with the techniques from Homemade Chocolate Bars 4 Ways, you now have the flexibility to experiment. So go ahead, let your imagination run wild, and enjoy the sweet rewards of your culinary adventure. Who knew chocolate could taste even better when made with love?
Print
Chocolate Bar Delight
- Total Time: 45 minutes
- Yield: 12 servings 1x
Description
A delicious chocolate bar recipe with a variety of toppings.
Ingredients
Scale
- 2 oz ruby chocolate
- 2 oz white chocolate
- 1 cup candy canes, crushed
- 1 cup Oreos, crushed
- 3 bars white chocolate
- 1/2 cup candied lemon peel, finely chopped
- 1 cup shredded coconut
- 3 bars milk chocolate
- 1/2 cup banana chips, lightly crushed
- 1/2 cup peanut butter
- 1/2 cup peanuts, chopped
- 1 tsp flakey sea salt
- 3 bars dark chocolate
- 1 cup waffle cones, crushed
- 1/2 cup freeze dried strawberries, lightly crushed
- 1/2 cup sprinkles
Instructions
- In a double boiler fitted with a candy thermometer, melt 2/3 of your chocolate to the “Melt To” temp listed in the table below, stirring constantly.
- Add the reserved 1/3 of the unmelted chocolate to the melted mixture and stir, cooling the chocolate to the “Cool To” temp listed in the table below.
- Continue stirring over low heat, warming the chocolate to the “Working Temp” listed in the table below.
- Optional: temper your chocolate.
- Arrange your mold on a clean baking sheet for easy transport.
- Spoon the melted ruby chocolate into a piping bag or Ziplock. Repeat with white chocolate. Snip the corners of the bags to make a small hole.
- Pipe a line of ruby chocolate into the mold, repeat with white chocolate. Continue to fill the mold, making a stripe pattern.
- Lift up the cookie sheet and gently tap it to the countertop to help remove any bubbles and level out the chocolate in the mold.
- Sprinkle your bar with toppings. Let set completely before removing from molds.
- Optional: temper your chocolate.
- Arrange your mold on a clean cookie sheet for easy transport. Pour the melted chocolate into mold.
- Lift up the cookie sheet and gently tap it to the countertop to help remove any bubbles and level out the chocolate in the mold.
- Spoon some peanut butter into into a piping bag or Ziplock. Snip the corner of the bag to make a very small hole.
- Pipe the peanut butter into thin lines, and use a toothpick to drag through the bar, making a feathered pattern. Sprinkle your bar with toppings.
- Let set completely before removing from molds.
- Optional: temper your chocolate.
- Arrange your mold on a clean cookie sheet for easy transport. Pour the melted chocolate into mold.
- Lift up the cookie sheet and gently tap it to the countertop to help remove any bubbles and level out the chocolate in the mold.
- Sprinkle your bar with toppings. Let set completely before removing from molds.
Notes
- Ensure all chocolate is evenly melted for best results.
- You can customize the toppings according to your preference.
- Store the finished bars in a cool, dry place.
- Prep Time: 30 minutes
- Cook Time: 15 minutes
- Category: Dessert
- Method: Melt, Pour, Set
- Cuisine: American
Nutrition
- Serving Size: 1 bar
- Calories: 200
- Sugar: 15g
- Sodium: 5mg
- Fat: 12g
- Saturated Fat: 7g
- Unsaturated Fat: 3g
- Trans Fat: 0g
- Carbohydrates: 25g
- Fiber: 2g
- Protein: 3g
- Cholesterol: 5mg