Follow Me On Social Media!

Lunch Lady Bars: Irresistibly Chewy Comfort in Every Bite
Introduction to Lunch Lady Bars
Imagine walking into your school cafeteria, the comforting scent of baked goods wafting through the air, and spotting those iconic Lunch Lady Bars on the dessert table. These delightful treats evoke memories of carefree school days—brightly colored icing, soft vanilla cake, and the unmistakable thrill of indulging in something sweet during lunchtime. Lunch Lady Bars forge a connection between the past and present, reminding us of simpler times, while also being a versatile dessert fit for any gathering today.
So what really makes these bars so special? It’s not just about nostalgia; it’s the combination of flavors and textures that create a balanced treat loved by both kids and adults. The original recipe, often made with just a few pantry staples, brings together a buttery cake base topped with a vibrant frosting that can be customized to suit your taste. The beauty lies in its simplicity, with each bite packing a punch of flavor that leaves you yearning for more.
What Makes Lunch Lady Bars a Nostalgic Treat?
Lunch Lady Bars are steeped in memories that many of us share. They remind us of those school days when snacks were a highlight—the perfect reward after a tough math test or a celebration with friends. The layered cake topped with a sweet frosting was always a crowd-pleaser and a snack that felt like a treat, even on ordinary days.
These bars also have an undeniably wholesome feel to them. The familiar ingredients like butter, sugar, and vanilla are often associated with home baking, connecting us to family and childhood memories spent in the kitchen. Each batch made can vary in color and flavor, making them perfect for special occasions or simply as an everyday dessert.
The experience of cutting into a pan of freshly baked Lunch Lady Bars, spreading colorful frosting atop, and sharing them with loved ones creates a sense of community. It’s not just a food item; it’s a shared memory that can be relived, rediscovered, and cherished, making these bars timeless treasures in our dessert repertoire. Whether enjoyed at a backyard party or a cozy gathering at home, Lunch Lady Bars will always have a place in our hearts—and on our dessert tables.

Key Ingredients for Lunch Lady Bars
Lunch Lady Bars evoke a sense of nostalgia for many of us, reminding us of simpler school days filled with sweet treats. Crafted with love and a medley of satisfying ingredients, these bars are perfect for any occasion, packed with flavor and goodness.
Peanut Butter: This creamy spread is the star of the show, adding both richness and depth to the bars. I recommend using natural peanut butter for the most authentic flavor and a wonderfully smooth texture.
Butter: Using both peanut butter and regular butter creates a delightful chewiness paired with a buttery richness. It’s a combination that’s hard to resist, ensuring that each bite melts in your mouth.
Sugars: A mix of granulated and brown sugar is essential for that perfect balance of sweetness. You’ll be rewarded with crispy edges and a soft center that makes these bars utterly irresistible.
Eggs: Eggs play a crucial role, binding the mixture and adding tenderness. They give the bars a substantial but light texture that keeps you coming back for more.
Vanilla: Just a splash of vanilla enhances the overall flavors, making every indulgent bite even more exceptional.
Flour: All-purpose flour serves as the backbone of this recipe, providing the necessary structure for delicious, chewy bars.
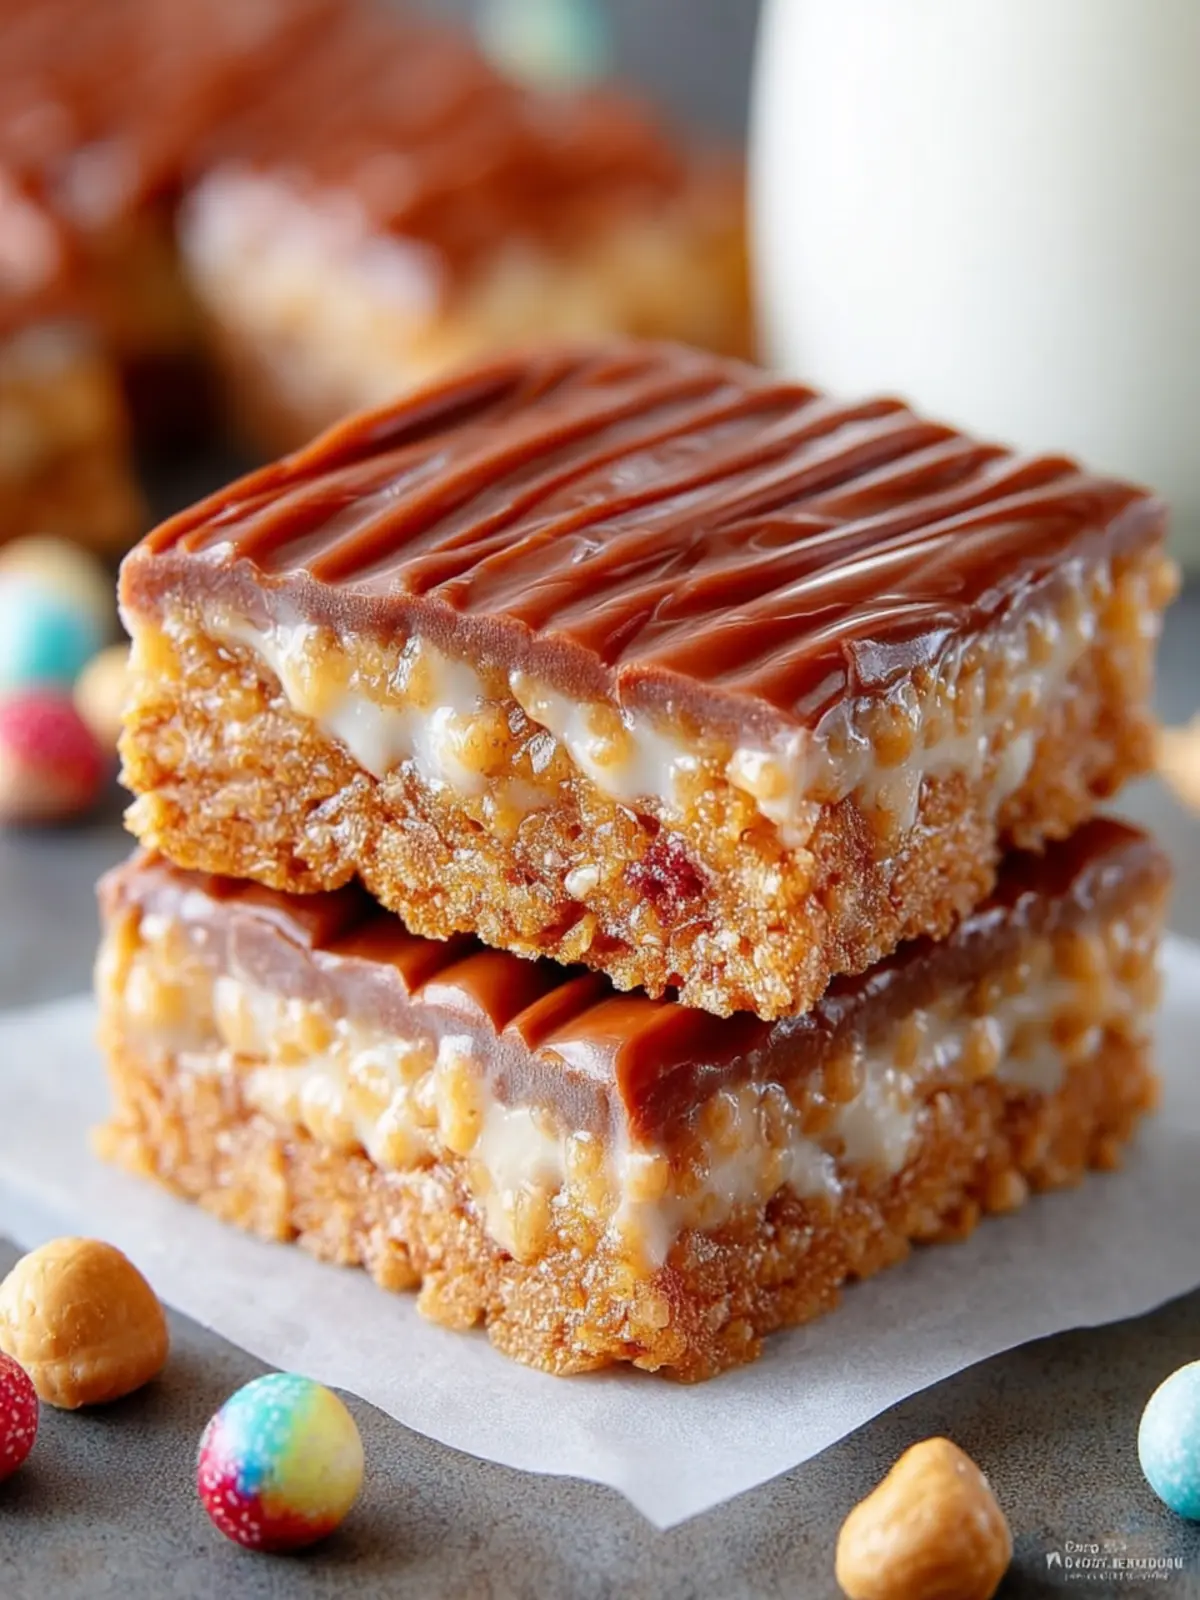
Oatmeal: Adding oatmeal enriches the mix with a hearty texture, perfectly complementing the sweetness.
Baking Soda and Salt: These are the unsung heroes, working together to help the bars rise beautifully while balancing the sweetness for a well-rounded taste.
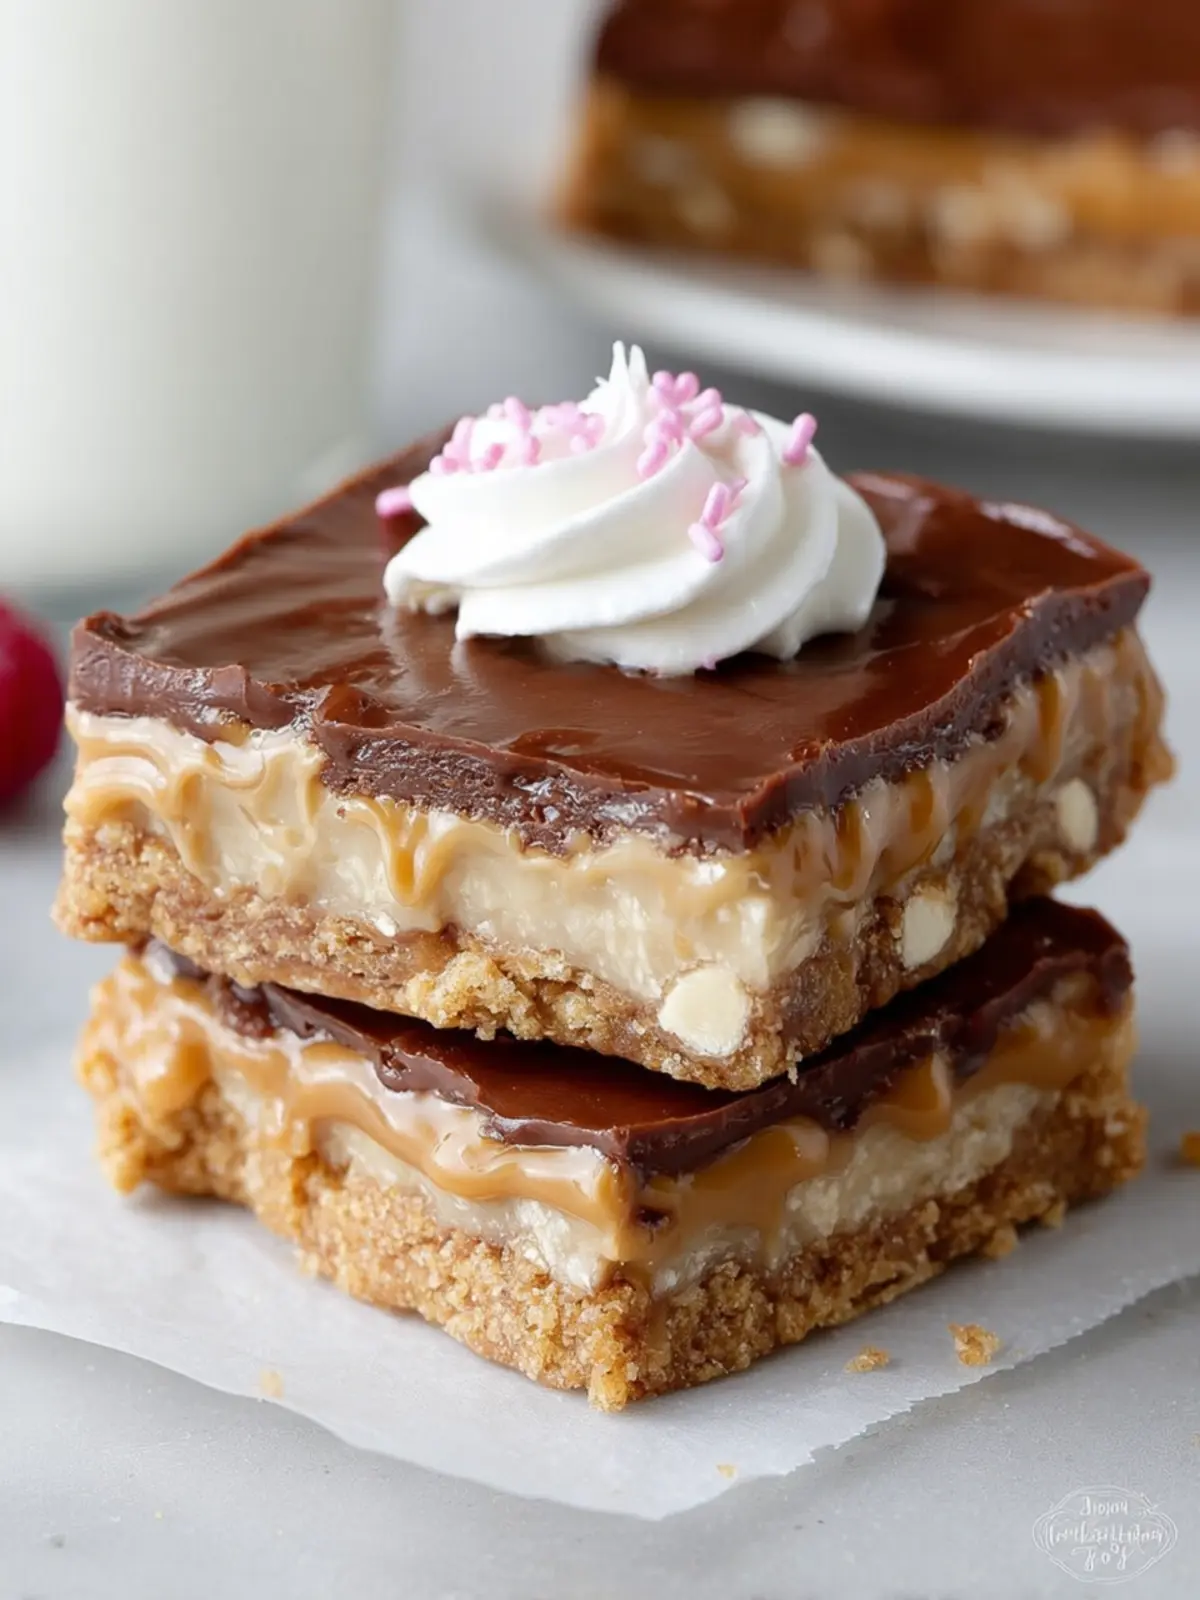
Milk Chocolate Frosting: To top it all off, a rich layer of chocolate frosting elevates these bars from delightful to unforgettable, turning a simple treat into a true indulgence.
With these key ingredients, your Lunch Lady Bars will be a hit at any gathering, reminding everyone of their fond childhood memories!
Why You’ll Love These Lunch Lady Bars
Imagine biting into a sweet, nostalgic treat that takes you back to childhood lunchrooms filled with laughter and warmth. Lunch Lady Bars do just that, transforming a simple snack time memory into a delightful experience that’s perfect for today’s busy lifestyle. Whether you enjoyed these bars in school or are discovering them for the first time, they offer a wonderfully rich texture and a balance of flavors that keep you coming back for more.
A Sweet Journey Begins
With their buttery base and luscious frosting, Lunch Lady Bars have become a favorite for gatherings or a comforting treat at home. They meld the perfect combination of cake-like decadence and creamy goodness, making them a versatile choice for any occasion, be it a picnic, birthday party, or even a cozy night in.
Perfect for Sharing
What truly makes these bars irresistible is their shareability. You can effortlessly cut them into squares, making them an ideal dessert for parties or bake sales. Plus, they’re simple to make, meaning you can whip up a batch in no time. And let’s face it; who doesn’t love a dessert that brings everyone together?
Embrace the joy that comes from making and sharing Lunch Lady Bars—they might just become your new go-to treat!
Variations on Lunch Lady Bars
Lunch Lady Bars bring back those nostalgic memories of school lunches, don’t they? But why not reinvent them? If you’re feeling adventurous, there are countless variations that can elevate these classic treats to new heights. Let’s explore some delightful twists that might just become your new favorites.
Flavorful Additions
-
Nut Butter: Swap out the traditional peanut butter for almond or sunbutter for a unique flavor profile. This not only changes the taste but can also accommodate nut allergies!
-
Coconut Flakes: Incorporating unsweetened coconut flakes can lend a tropical touch. Just a half cup mixed into the batter makes for a delightful surprise.
Topping Variations
-
Fruit Toppings: Fresh, sliced strawberries or blueberries can brighten up the simple icing. Not only do they add color, they also infuse a burst of freshness.
-
Chocolate Drizzle: For the chocolate lovers among us, drizzling melted chocolate over the frosted bars is always a welcome addition.
Cookie Crust Base
Consider a cookie crust instead of the typical graham cracker base. A chocolate chip cookie base creates an entirely new dessert experience and gives it that extra chewy texture.
Dairy-Free Option
If you’re looking for a Lunch Lady Bars recipe that caters to dietary restrictions, try using dairy-free substitutes for butter and milk. Coconut oil and almond milk work beautifully in this context.
Experimenting with these variations can make your next batch of Lunch Lady Bars not just a trip down memory lane, but a thrilling taste adventure!
Cooking Tips and Notes for Lunch Lady Bars
Creating Lunch Lady Bars is a delightful journey that whisks you back to those carefree school days. As you mix and bake, remember these handy tips and insights to elevate your baking experience.
Perfecting Your Base
-
Butter: Use unsalted butter for the best flavor and control over the saltiness of your bars. Make sure it’s softened to room temperature for easy blending with sugars, creating that perfect consistency.
-
Sugar: Combining both brown and granulated sugars gives your Lunch Lady Bars the ideal texture and sweetness. The brown sugar adds moisture and a rich flavor, while granulated sugar helps achieve a nice crust.
The Importance of Eggs
- Eggs: Make sure your eggs are at room temperature before mixing. This ensures they blend smoothly into the batter, providing the right structure and rise to your bars.
Mixing Matters
- Do Not Overmix: Once you combine wet and dry ingredients, mix just until incorporated. Overmixing can lead to dense bars instead of the tender texture we love.
Baking Pan Tips
- Pan Preparation: Lining your baking pan with parchment paper not only helps with easy removal but also ensures even baking. Leave some overhang for easy lifting.
Storage Strategies
- Keeping Fresh: Store your Lunch Lady Bars in an airtight container at room temperature for up to a week. Or, if you want to enjoy them later, freeze them neatly wrapped for up to three months!
With these tips, you’re well on your way to baking perfect Lunch Lady Bars that evoke nostalgia and delight your taste buds. Happy baking!

Serving Suggestions for Lunch Lady Bars
If you’ve ever experienced the joy of biting into a Lunch Lady Bar, you understand why they’re such a treasured nostalgic treat. Not just a dessert, these bars can be perfect for various occasions and pair beautifully with a variety of food and drink options.
Simple Pairings
- Coffee or Tea: Enjoy your bars with a morning brew or afternoon tea. The sweet, buttery flavor complements both drinks wonderfully.
- Milk: There’s nothing quite like the classic combo of a sweet treat with a cold glass of milk. It softens the bars just a bit, enhancing every delicious bite.
Creative Serving Ideas
- Fruit Garnish: Add a fresh touch by serving your Lunch Lady Bars with sliced strawberries or a handful of blueberries. This not only looks appealing, but the tartness of the fruit balances the sweetness beautifully.
- Dessert Platter: These bars are an excellent addition to a dessert spread at potlucks or gatherings. Slice them into smaller pieces for easy sharing, alongside brownies or cookies for variety.
With these simple suggestions, you’ll elevate your Lunch Lady Bars experience to new heights while enjoying their comforting, homemade feel.
Time Breakdown for Lunch Lady Bars
Creating Lunch Lady Bars is not just about the recipe; it’s a delightful experience that can easily fit into your day.
Preparation time
To get started with your Lunch Lady Bars, you’ll want to carve out about 15 minutes for preparation. This includes gathering all your ingredients, mixing the batter, and pouring it into the pan for baking.
Baking time
Once your mixture is ready, pop it in the oven for about 25 minutes. You’ll want to keep an eye on them as they bake, but trust me, the aroma will be irresistible!
Total time
In just around 40 minutes, you can go from an idea to a sweet, mouthwatering treat that might remind you of your school days. Enjoy the process, and don’t forget to share!
Nutritional Facts for Lunch Lady Bars
When you indulge in a nostalgic treat like Lunch Lady Bars, it’s good to be in the know about their nutritional profile. These bars are not just delicious; they also offer a satisfying balance of nutrients.
Calories
Each serving of Lunch Lady Bars contains approximately 180 calories. This makes them a delightful option for an afternoon pick-me-up without completely derailing your daily calorie intake.
Protein
You’ll find around 3 grams of protein per serving. While these bars may not be a protein powerhouse, they do provide a little boost, especially when paired with a side of yogurt or a glass of milk.
Sugar
A single Lunch Lady Bar has about 12 grams of sugar. While it’s sweet, you can easily adjust the sugar levels according to your taste, allowing for a customizable dessert experience that won’t leave you feeling guilty. Remember, moderation is key to enjoying these delightful squares!
FAQ about Lunch Lady Bars
When it comes to Lunch Lady Bars, there’s a lot of curiosity surrounding their delightful texture and flavor. These nostalgia-inducing treats are perfect for snacking or dessert, and many of you have burning questions. Let’s dig into the most common inquiries!
Can I use different types of nut butter?
Absolutely! While the classic recipe might call for peanut butter, feel free to explore other nut butters like almond or cashew for a unique twist. Each type of nut butter will lend its own flavor and texture, so it’s all about what you enjoy. Just make sure your chosen butter has a similar consistency to peanut butter for the best results.
How should I store leftover bars?
To keep your Lunch Lady Bars fresh, store them in an airtight container at room temperature for up to five days. If you live in a particularly warm climate, consider refrigerating them to maintain their texture. Just let them come to room temperature before enjoying for the best flavor.
Can I freeze these bars for later?
Yes, you can definitely freeze Lunch Lady Bars! Simply cut them into squares, wrap each bar individually in plastic wrap, and place them in a sealed freezer bag. They can be stored in the freezer for up to three months. When you’re ready to indulge, thaw them overnight in the refrigerator, and they’ll taste as good as fresh!
Feel free to ask more questions about this fabulous recipe; I’m here to help you make the most of your baking experience!
Conclusion on Lunch Lady Bars
In wrapping up our look into Lunch Lady Bars, it’s clear that these delightful treats hold a special place in many hearts, evoking fond memories of school lunches and family gatherings. The chewy, gooey combination of soft bars layered with sweet frosting makes them a perfect indulgence for any occasion.
Remember, crafting the perfect Lunch Lady Bars allows for creativity. Whether you stick to the classic recipe or throw in your favorite mix-ins, you can personalize them to suit your tastes. So gather your ingredients, unleash your inner child, and enjoy every bite of these nostalgic treats!
Print
Peanut Butter Chocolate Bars
- Total Time: 29 minutes
- Yield: 24 squares 1x
- Diet: Vegetarian
Description
Delicious and easy-to-make peanut butter chocolate bars topped with creamy chocolate frosting.
Ingredients
Scale
- 3/4 cup peanut butter
- 3/4 cup butter
- 3/4 cup sugar
- 3/4 cup brown sugar
- 2 eggs
- 1 1/2 teaspoons vanilla
- 1 1/2 cups flour
- 1/2 teaspoon salt
- 3/4 teaspoon baking soda
- 1 1/2 cups oatmeal
- 16 ounces milk chocolate frosting
Instructions
- Blend butters and sugars together, then stir in eggs and vanilla.
- In a separate bowl, stir flour, salt, baking soda, and oatmeal together.
- Add dry ingredients to wet ingredients and mix well.
- Press dough evenly onto an ungreased cookie sheet/jelly roll pan.
- Bake at 350-degrees for 12-14 minutes (do not overcook).
- Allow to cool, then spread chocolate frosting evenly over the bars.
- Cut into individual squares.
Notes
- For best results, do not overbake the bars to ensure they remain chewy.
- Prep Time: 15 minutes
- Cook Time: 14 minutes
- Category: Dessert
- Method: Baking
- Cuisine: American
Nutrition
- Serving Size: 1 square
- Calories: 250
- Sugar: 20g
- Sodium: 150mg
- Fat: 12g
- Saturated Fat: 5g
- Unsaturated Fat: 5g
- Trans Fat: 0g
- Carbohydrates: 35g
- Fiber: 2g
- Protein: 4g
- Cholesterol: 30mg